How to Test Failover in Azure Site Recovery
Learn how to effectively test failover in Azure Site Recovery to ensure your disaster recovery plan is robust and compliant.
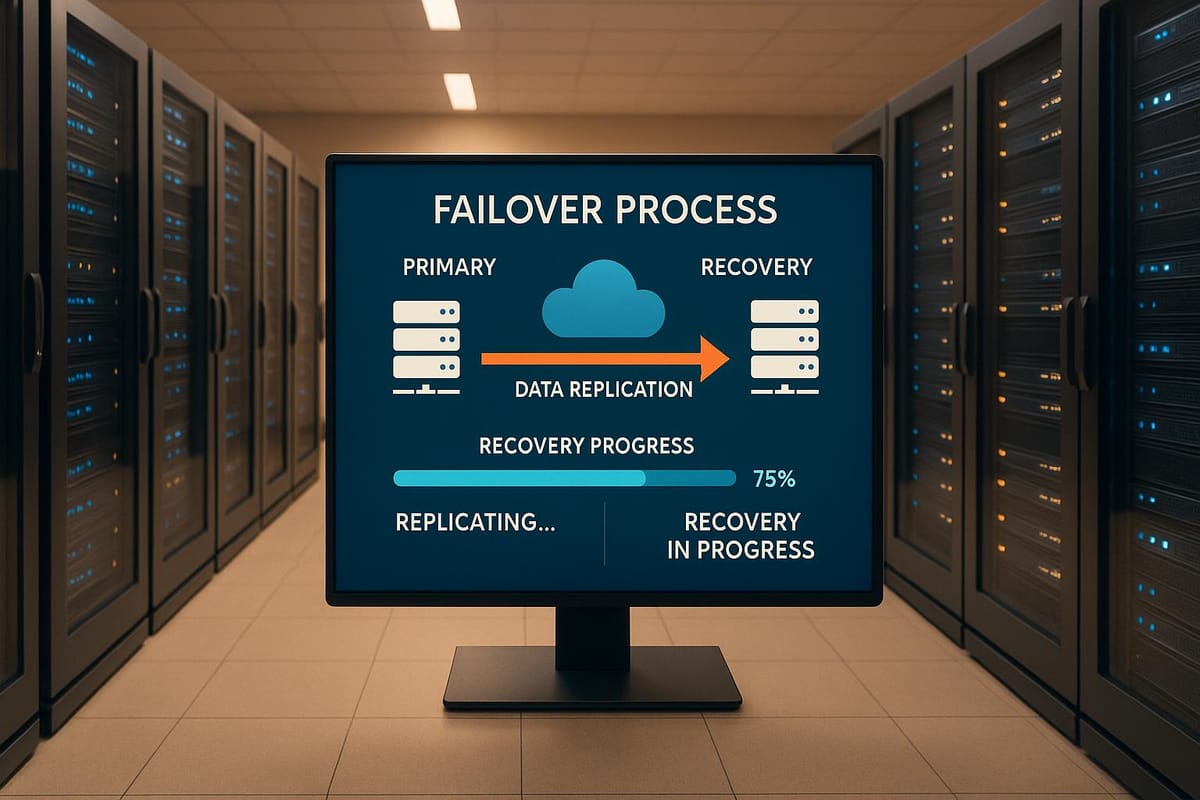
Want to ensure your disaster recovery plan works when it matters most? Azure Site Recovery (ASR) lets you replicate workloads and test failovers without disrupting live systems. Here's what you need to know:
- Azure Site Recovery: A disaster recovery solution for replicating virtual machines, physical servers, and on-premises environments to Azure or another site.
- Why Test Failover? Regular failover tests ensure systems can recover during outages, reduce human error (responsible for 80% of outages), and support compliance with UK regulations like GDPR.
- Quick Steps:
- Set up a Recovery Services Vault to manage replication and failover.
- Configure an isolated test virtual network to avoid impacting production.
- Assign the right roles (e.g., Site Recovery Contributor) for access control.
- Use the Azure portal to initiate and monitor test failovers.
- Validate recovery by checking VM performance, application functionality, and data consistency.
- Clean up test resources to avoid unnecessary costs.
Best Practices:
- Schedule failover tests quarterly and after major infrastructure changes.
- Use cost-saving options like Azure Reserved Instances to lower expenses.
- Document test results for compliance and improvement.
Testing failover ensures your systems are ready for disruptions, protects your business operations, and helps you meet regulatory requirements. Let’s dive in to learn more.
Learn Live - Protect your Azure infrastructure with Azure Site Recovery
Prerequisites for Testing Failover in Azure Site Recovery
To ensure a smooth test failover in Azure Site Recovery, you’ll need to complete several key setup steps. These configurations help isolate your disaster recovery environment from your live systems, minimising risks during testing.
Setting Up the Recovery Services Vault
The Recovery Services Vault acts as the central hub for managing all Azure Site Recovery operations. It stores metadata about your protected resources but does not hold any actual customer data, making it a critical component of your disaster recovery setup. For UK organisations, this setup also supports compliance with data sovereignty regulations.
When creating the vault, select a location that fits your disaster recovery strategy. For instance, if you’re implementing zone-to-zone disaster recovery, you can choose a vault in a different region to ensure geographic redundancy.
Before enabling replication, confirm that your virtual machines meet Azure’s compute, storage, and networking requirements. The setup process involves registering your source infrastructure and defining protection policies. These policies specify how often data is replicated and how long recovery points are kept.
Configuring a Test Virtual Network
An isolated test network is essential for running failover tests without disrupting your production systems. This network must be fully separated from your live environment to avoid unintended interactions during testing.
Start by designing the test virtual network with subnets tailored to your security needs. Use Network Security Groups (NSGs) to manage traffic flow between subnets, restricting access to only the required ports and protocols.
Industry reports show that well-designed virtual networks and strict NSG policies significantly improve the reliability of cloud environments.
For secure connectivity, consider using Azure Private Link or Virtual Network endpoints. These tools allow isolated communication with other Azure services, keeping traffic off the public internet.
Plan and create all necessary network resources ahead of time. When initiating a test failover in the Azure portal, you’ll select this pre-configured test network to maintain consistency across multiple testing scenarios.
Checking Permissions and Access
Azure Site Recovery relies on role-based access control (RBAC) to manage permissions for disaster recovery tasks. It’s important that your team has the correct access levels to perform failover tests when required.
Azure provides three built-in roles specifically for Site Recovery operations:
- Site Recovery Contributor: Grants full operational control, including all management tasks within a vault, except creating/deleting vaults and assigning access rights.
- Site Recovery Operator: Allows execution of failover and failback operations but does not permit enabling/disabling replication or infrastructure management.
- Site Recovery Reader: Provides read-only access, useful for monitoring and compliance purposes.
Additionally, when enabling replication for new virtual machines, users need permissions to create virtual machines in the chosen resource group and virtual network. They also require write access to the designated storage account. For this, roles like Virtual Machine Contributor and Classic Virtual Machine Contributor are suitable, depending on whether you’re using the Resource Manager or Classic deployment model.
Once these steps are completed, you’ll be ready to initiate and oversee a test failover with confidence.
Step-by-Step Guide to Execute a Test Failover
With all prerequisites in place, you’re ready to execute a test failover. This process ensures your disaster recovery plan works as expected without disrupting your production environment.
Starting the Test Failover in Azure Portal
To begin, go to your Recovery Services Vault in the Azure portal. Find the Site Recovery section and click on Recovery Plans. From there, select your recovery plan and click Test Failover to start the process. You’ll see configuration options, including the ability to choose a pre-configured test virtual network. Make sure the test network is isolated from your production environment before proceeding.
Azure Site Recovery will create test virtual machines within a subnet that matches the name and IP address settings of your original VMs. For UK-based businesses, this automated IP assignment ensures consistency - provided your test network mirrors the structure of your production environment, including subnets and IP ranges.
The next step involves selecting a recovery point that aligns with your goals, balancing downtime with data accuracy.
Selecting Recovery Points
The recovery point you choose will impact both your Recovery Time Objective (RTO) and Recovery Point Objective (RPO). Azure Site Recovery offers several options:
- Latest processed: Minimises downtime by using the most recent processed data.
- Latest: Reduces data loss by recovering the most recent available data.
- Latest app-consistent: Preserves application data integrity by using checkpoints that ensure applications remain consistent.
- Custom: Allows you to select a specific recovery point.
Your choice should reflect the focus of your test. For a thorough disaster recovery simulation, Latest app-consistent generally offers the most realistic conditions. However, if speed is your priority for a routine test, Latest processed might be more suitable.
Once you’ve made your selection, keep an eye on the failover process to ensure everything runs smoothly.
Monitoring and Verifying the Test Failover
To monitor progress, check the Jobs tab in the Azure portal. When the failover completes, verify that the test virtual machine is running in the target region. Confirm that it’s correctly sized and connected to the appropriate test network.
Access the test VM via RDP or SSH to validate data, applications, and services. Use the Recovery Services dashboard to review replication health, failover status, and any related events. For ongoing awareness, you might want to subscribe to email alerts for critical updates, such as changes in replication status or connectivity issues.
Finally, document everything - performance observations, application behaviour, or any connectivity problems. These notes are essential for compliance and improving your disaster recovery processes. Once all tests are complete and issues resolved, mark the test as successful and proceed with the cleanup.
Validating and Cleaning Up After the Test
Once your test failover is complete, it's time to validate your disaster recovery plan and ensure you're not incurring unnecessary Azure costs. This step involves careful checks and detailed documentation to meet compliance standards.
Validation Checklist
Start by confirming that the test virtual machine (VM) is listed under Virtual Machines, is running, correctly sized, and connected to the test network. Test VMs often have a '-test' suffix for easy identification.
Next, connect to the test VM using RDP or SSH to ensure that everything is functioning as expected. This isn't just about checking if the VM boots up - it’s crucial to verify application functionality, data accuracy, and performance levels. Test critical business applications to ensure they work seamlessly in the recovery environment.
Pay close attention to areas like database connections, file shares, and network dependencies. Make sure user accounts, permissions, and security settings have been transferred correctly. If your organisation relies on specific performance benchmarks, compare the test results with your baseline metrics to spot any performance issues that could impact your Recovery Time Objective (RTO).
Document any problems you encounter during this phase. These notes will help refine your disaster recovery plan and serve as evidence of due diligence during audits.
Post-Test Cleanup
Once you're confident everything is running as it should, it's time to clean up. In the Azure portal, go to the Essentials or Overview page for your replicated item and select Cleanup test failover.
The clean-up interface typically includes a Notes section. Use this space to record key observations, such as the participants involved, test outcomes, any issues that arose, and suggestions for improvement [17, 21]. Be sure to tick the checkbox to delete all test failover VMs. You can monitor the clean-up progress via Azure portal notifications to confirm that all test resources are fully removed.
Documenting Test Results for Compliance
After the clean-up, document the test results thoroughly. This documentation will serve as compliance evidence. Include details such as the test date and time (formatted as DD/MM/YYYY HH:MM), participants, systems tested, and outcomes.
Record your RTO and Recovery Point Objective (RPO) achievements, noting whether your recovery times and data loss thresholds were met. Include screenshots and key performance metrics to support your findings.
Store these records in a centralised location where they can be easily accessed. Many UK organisations keep disaster recovery test logs for several years to demonstrate their commitment to compliance and due diligence to regulators and insurers. You might also consider creating a standardised report template. This will make it easier to track improvements over time and spot recurring issues in future tests.
Best Practices for Failover Testing and Optimisation
Building a reliable failover testing routine takes careful planning and efficient use of resources. For UK-based small and medium-sized businesses (SMBs), this means balancing thorough disaster recovery checks with cost-conscious operations, all while adhering to local compliance standards.
Scheduling Regular Test Failovers
Once you’ve developed your failover testing strategy, it’s essential to schedule tests regularly to keep improving your disaster recovery plan. Aim to review and update these plans at least every quarter, aligning them with your financial quarters for consistency with other business processes.
Timing is everything when it comes to test failovers. To minimise disruption, avoid peak trading periods like the pre-Christmas rush, Black Friday, or end-of-financial-year activities. Instead, schedule tests during quieter times, such as mid-January or late summer, when business activity tends to slow down.
Annual full-scale disaster recovery drills are invaluable for simulating real-world scenarios. These simulations should include your IT team and key stakeholders, testing both technical recovery and communication protocols. Complement these larger drills with smaller, monthly tests that focus on specific systems or applications.
The good news? Test failovers don’t disrupt ongoing data replication or production environments. This means you can run these tests during business hours if needed, without worrying about system downtime.
To stay on top of things, create a testing calendar that includes quarterly reviews and ad-hoc tests after major infrastructure changes. This ensures your disaster recovery plan adapts to your business’s evolving needs while maintaining regular validation cycles.
Cost-Effective Resource Usage
Controlling Azure costs during failover testing requires a smart approach to resource allocation and monitoring. One way to save is by using Azure Reserved Instances, which can cut virtual machine (VM) costs by up to 72%. This is particularly useful for businesses conducting regular tests.
If your testing schedule is predictable, consider the Azure Savings Plan, which can reduce compute costs by up to 65% compared to pay-as-you-go rates. This works well for monthly or quarterly failover tests, as it allows you to plan resource needs in advance.
Keep a close eye on testing costs using the Azure Cost Management dashboard, which displays expenses in pounds (£). Setting budget alerts can help you avoid any surprises.
To further control costs, use a network isolated from your production recovery site during test failovers. This prevents unnecessary data transfer charges and ensures no accidental interference with live systems. Remember, any VMs created for testing are temporary - changes made during these tests won’t be replicated back to the primary VM.
Finally, schedule tests during off-peak hours to cut costs, especially for data transfers and compute-heavy operations.
Using Expert Advice on Azure Optimisation
Beyond basic cost control, optimising Azure for failover testing involves fine-tuning architecture, security, and performance. The Azure Optimization Tips, Costs & Best Practices blog (https://azure.criticalcloud.ai) is a great resource tailored specifically for SMBs using Microsoft Azure. It offers actionable advice that complements your disaster recovery efforts.
This blog provides insights into improving recovery time objectives, securing test environments, and identifying bottlenecks in recovery processes before they become serious issues. For example, it highlights how to assess and optimise network bandwidth to support continuous data replication. By following expert advice on network configuration and monitoring, you can reduce latency during both tests and actual recovery scenarios.
As your business grows, so do your disaster recovery needs. The blog’s SMB-specific scaling tips are particularly helpful for navigating the complexities of expanding infrastructure while keeping operations cost-efficient and thorough.
Automation is another area where expert guidance can make a difference. Implementing automated processes for failover and failback reduces manual effort, minimises human error, and ensures consistent test results - ideal for compliance documentation and operational reliability.
Incorporating these expert recommendations into your strategy will help you fine-tune your failover testing approach and stay prepared for any potential disruptions.
Conclusion
Testing failover with Azure Site Recovery is an essential step in ensuring your disaster recovery plan is effective - without risking downtime or data loss. For businesses in the UK, this process not only supports recovery objectives but also helps meet regulatory requirements, such as compliance with ISO 27001 standards.
The secret to effective failover testing is consistency and improvement. By conducting quarterly reviews and full-scale drills, you can test both your technology and your team's readiness. This proactive approach helps uncover potential issues before they develop into major problems, allowing for quicker recovery times and reducing the likelihood of human error. It’s a strategy that protects operations and informs smarter, more efficient planning.
"Azure Site Recovery offers ease of deployment, cost effectiveness, and dependability. Deploy replication, failover, and recovery processes through Site Recovery to help keep your applications running during planned and unplanned outages." – Azure
For small and medium-sized businesses (SMBs), keeping costs under control is a priority. Solutions like Azure Reserved Instances and Savings Plans can help cut costs by up to 72% and 65%, respectively.
Documentation is just as important as testing. Make sure to record the results of your failover tests and involve key stakeholders in refining your recovery plan. This ensures your organisation is prepared to respond effectively to any incident.
FAQs
How can I run a test failover in Azure Site Recovery without affecting my live production environment?
To keep your live production environment safe during a test failover in Azure Site Recovery, it’s crucial to run the test in an isolated network or virtual environment. This approach ensures that no traffic or processes from the test interfere with your active workloads.
By isolating the test, you can confidently verify your disaster recovery plan, inspect configurations, and spot any potential problems - all without disrupting daily operations. Make sure your test environment closely mirrors your production setup for the most reliable and accurate results.
What should I consider when selecting a recovery point for a test failover in Azure Site Recovery?
When selecting a recovery point for a test failover, make sure it matches your Recovery Point Objective (RPO) to keep data loss to a minimum. Choose a recovery point that’s recent enough to ensure meaningful testing, and double-check its integrity before initiating the failover. It’s also important to confirm that the recovery point is accessible and works seamlessly with your test environment to prevent delays or complications during the process.
How can I document and use test failover results in Azure Site Recovery to strengthen my disaster recovery plan?
When conducting a test failover in Azure Site Recovery, it's essential to document critical results like recovery times, success rates, and any issues that arise during the process. This information is invaluable for spotting weaknesses and identifying areas that need improvement in your disaster recovery plan.
Once the test is complete, take the time to carefully analyse the results. Use these insights to update your recovery strategy, addressing any inefficiencies or vulnerabilities uncovered. By testing and refining your plan regularly, you can ensure it stays effective and aligned with current best practices - boosting your organisation's confidence in its ability to handle disruptions.