How to Monitor Azure Resource Tags with Azure Monitor
Learn how to effectively monitor Azure resource tags for enhanced governance, cost management, and operational efficiency using Azure Monitor.
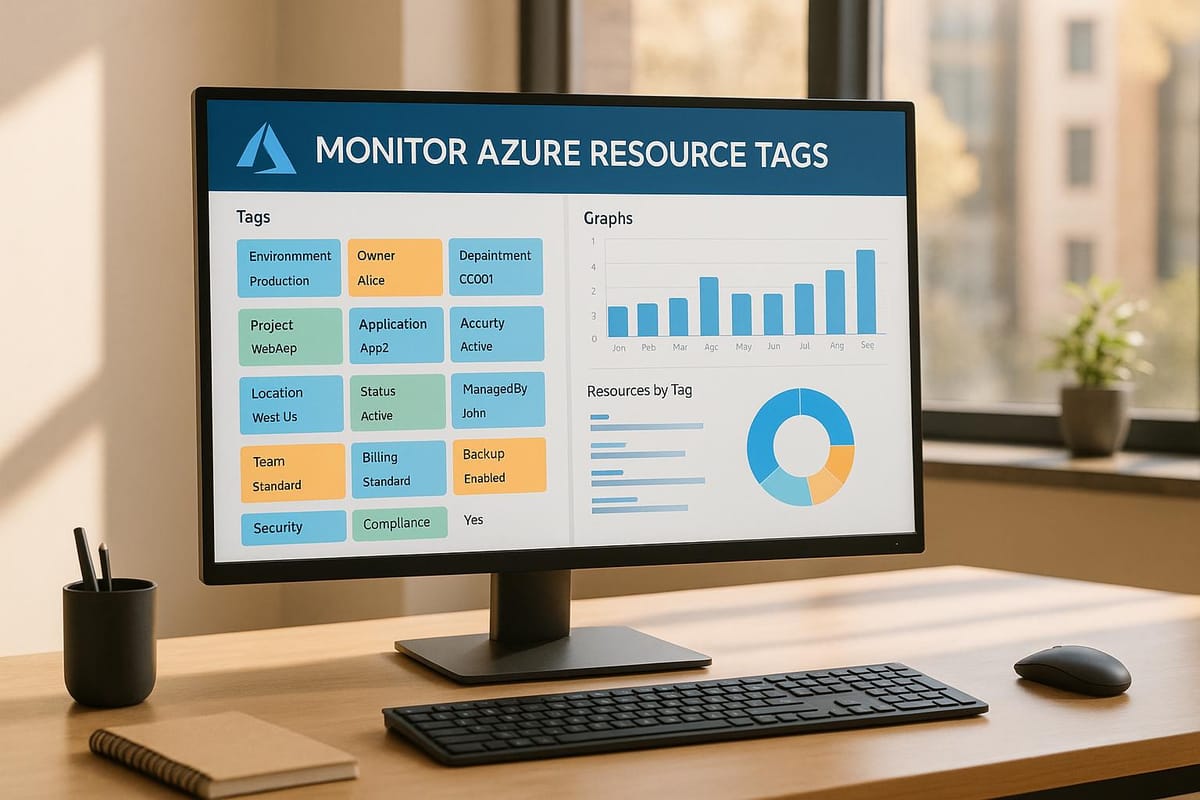
Azure Monitor helps you track and analyse Azure resource tags, turning simple metadata into powerful tools for governance, cost management, and operational efficiency. Tags are key-value pairs that categorise resources, enabling better organisation and tracking. Here’s what you need to know:
-
Why Tags Matter:
Tags simplify cost attribution, improve governance, and enhance operational visibility. For example, use tags likeOwner,CostCentre, orEnvironmentto assign responsibility, track expenses, or identify resource purposes. -
Tagging Limits:
Azure supports up to 50 tags per resource, with character limits for tag names (512 for most resources, 128 for storage accounts) and values (256). -
Setup Steps:
- Use Log Analytics for collecting and storing tag data.
- Configure Data Collection Rules (DCRs) to define what data to track.
- Enable diagnostic settings to gather tag data across resources.
-
Monitoring Tools:
Use KQL queries to analyse tag compliance, identify missing tags, or summarise tag usage. For example:resources | where isempty(tags.Environment) or isempty(tags.CostCentre) | project name, type, tags -
Governance with Azure Policy:
Enforce tagging rules to ensure compliance, prevent untagged resources, and automatically apply missing tags using policies. -
Cost Management:
Tags allow you to track spending by department, project, or environment. Set up tag-based budgets and alerts to avoid overspending. -
Dashboards:
Create dynamic Azure Workbooks to visualise tag data using charts, grids, and interactive filters.
Quick Comparison of Tag Monitoring Tools
| Tool | Purpose | Best Use Case |
|---|---|---|
| Log Analytics | Store and query tag data | Real-time analysis |
| Azure Policy | Enforce tagging rules | Governance and compliance |
| Azure Workbooks | Visualise tag insights | Interactive dashboards |
| KQL Queries | Analyse tag data | Tag compliance and reporting |
Alerting on Azure Resource Graph Queries
Required Setup for Tag Monitoring
To effectively track and manage resources, it's essential to have the right permissions and a standardised tagging system in place. These steps ensure proper governance and streamlined monitoring.
Azure Monitor Setup Steps
Azure Monitor requires specific roles and configurations. For example, the Monitoring Contributor role allows modifications, while the Monitoring Reader role provides view-only access.
Here’s what you’ll need to get started:
- Access Configuration: Set up a Log Analytics workspace with contributor rights. This workspace serves as the central hub for all monitoring data.
- Storage Requirements: Create a dedicated storage account for monitoring purposes. When granting access to users or applications, generate a SAS (Shared Access Signature) with read-only permissions at the service level.
- Network Configuration: Enable the AzureMonitor and AzureResourceManager service tags on your virtual network. This ensures smooth communication and monitoring for your resources.
Basic Tag Structure Setup
A clear and consistent tagging system is key to effective monitoring. Below is a table of recommended tags for comprehensive resource tracking:
| Tag Category | Purpose | Example Values |
|---|---|---|
| Business Unit | Identifies ownership | Finance, Marketing, SharedServices |
| Criticality | Indicates importance | Mission-critical, Business-critical, Low |
| Operations Team | Specifies responsibility | Central-IT, Cloud-Ops, Platform-Team |
| Data Classification | Defines security level | Public, Confidential, Highly-confidential |
Keep in mind the limits: Azure allows up to 50 tags per resource, with storage account tags limited to 128 characters for names and 256 for values.
To ensure effective tag monitoring, follow these steps:
- Standardisation: Develop consistent naming conventions across your organisation. This improves reliability in monitoring and reporting.
- Policy Implementation: Use Azure Policy to enforce tagging rules. This prevents the creation of resources that don’t meet your standards.
- Access Control: Restrict access to monitoring-related event hubs by implementing authorisation rules. Only grant access to those who genuinely need it.
Once these tagging and monitoring standards are in place, you can move forward with configuring data collection in Azure Monitor.
Setting Up Tag Monitoring in Azure Monitor
Once you've established your tag structure, the next step is to configure Azure Monitor to gather tag data and organise it within your Log Analytics workspace. This process integrates smoothly with your existing monitoring setup.
Configure Tag Data Collection
To start collecting tag data, follow these key steps:
-
Create Data Collection Rules (DCRs):
Define the specifics of your data collection, including:- The resource types to monitor
- How often data should be collected
- Any transformation rules for incoming data
- Setting Log Analytics as the destination
-
Enable Resource Diagnostics:
Configure diagnostic settings for each resource. Keep in mind that data may take up to 90 minutes to appear.
| Destination Type | Best Used For | Cost Considerations |
|---|---|---|
| Log Analytics | Real-time analysis and querying | Higher cost, ideal for active monitoring |
| Storage Account | Long-term archival and compliance needs | Most cost-effective for data retention |
| Event Hubs | Integration with third-party tools, streaming | Moderate cost, suitable for real-time processing |
Set Up Tag Data Tables
After configuring data collection, it's crucial to organise the incoming tag data for efficient monitoring.
Choose a table plan that aligns with your needs:
- Analytics: Ideal for frequently accessed tag data requiring detailed queries.
- Basic: Suitable for general monitoring with occasional data access.
- Auxiliary: Best for compliance-related data that is rarely accessed.
"Tags provide a fairly simple way to label resources in a way that makes sense to your organization, such as to a specific engineering team. It enables you to assign categories to your resources so you can easily group, monitor, track, and filter them in any environment."
To optimise your tag data collection, consider these steps:
- Create separate tables for each tag category, ensuring the retention settings match your needs.
- Use KQL (Kusto Query Language) to standardise and streamline tag data.
- Set up Data Collection Rule Associations (DCRAs) to efficiently connect rules with resources.
This setup ensures your tag data is well-organised and ready to support your monitoring and analysis efforts.
Tag Analysis with KQL
KQL (Kusto Query Language) is a powerful tool for analysing Azure resource tags. With well-crafted queries, you can extract valuable insights, ensuring your resources are tagged correctly and managed effectively.
KQL Query Examples
Here are some practical KQL queries to help you gain meaningful insights into your tag data:
1. Identify Resources Missing Required Tags
This query helps pinpoint resources that lack essential tags, such as Environment or CostCentre:
resources
| where isempty(tags.Environment) or isempty(tags.CostCentre)
| project name, type, resourceGroup, tags
2. Get an Overview of Tag Compliance
Use this query to summarise the distribution of tags across your resources:
resources
| where isnotempty(tags)
| mvexpand tags
| extend tagKey = tostring(bag_keys(tags)[0])
| extend tagValue = tostring(tags[tagKey])
| summarize TagCount = count() by tagKey
| order by TagCount desc
This structured approach to querying supports a robust tag monitoring strategy, ensuring better governance and accountability.
Optimising Your Queries
To get the most out of your KQL queries, keep these tips in mind:
- Use
hasinstead ofcontainsfor filtering text. - Apply filters in this order: datetime first, followed by string and numeric filters.
- Place
whereclauses directly after table references for better performance. - Leverage
materialize()for datasets you access frequently.
"Proper tagging of resources is crucial for efficient management, cost allocation, and accountability." – Lex Hegt
Advanced Tag Monitoring Queries
For a deeper dive into your tag data, try these additional queries:
Tag Distribution Analysis
Understand how tags are distributed across your resources:
ResourceContainers
| where isnotempty(tags)
| project tags
| mvexpand tags
| extend tagKey = tostring(bag_keys(tags)[0])
| extend tagValue = tostring(tags[tagKey])
| where tagKey !startswith "hidden-"
| summarize ResourceCount = count() by tagKey, tagValue
Tag Consistency Check
Ensure consistent tagging by identifying variations in tag keys, particularly for tags like Environment:
resources
| where isnotempty(tags)
| mvexpand tags
| extend tagKey = tostring(bag_keys(tags)[0])
| where tagKey matches regex "(?i)environment"
| distinct tagKey
Real-Time Monitoring with Alerts
Combine KQL with Azure Monitor alerts to track critical changes in real time:
alertsmanagementresources
| where properties.essentials.startDateTime > ago(12h)
| where tostring(properties.essentials.monitorService) <> "ActivityLog Administrative"
| project
    alertId = id,
    name,
    targetResource = tostring(properties.essentials.targetResource),
    startDateTime = todatetime(properties.essentials.startDateTime)
| join kind=leftouter
    (resources | project targetResource = tolower(id), targetResourceTags = tags)
    on targetResource
These queries not only enhance your ability to analyse and monitor tags but also lay the foundation for detailed reporting and automated policy enforcement. By integrating these techniques into your workflow, you can maintain strong governance and operational efficiency.
Creating Tag Reports in Azure Workbooks
When it comes to managing tags effectively, Azure Workbooks offers a powerful way to visualise and interact with your data. These dashboards turn raw query results into actionable insights, helping you make real-time decisions to improve governance.
Tag Dashboard Creation
To get started, head to the Azure Workbooks Gallery, where you'll find a range of pre-built templates to jumpstart your dashboard creation.
-
Set up your data connections: Link your dashboard to data sources such as:
- Azure Monitor logs
- Azure Resource Graph
- Log Analytics workspaces
- Application Insights
- Design a meaningful layout: Arrange your dashboard to clearly present tag data. For example, a combination of list and map views with filtering options, as demonstrated in Microsoft's January 2025 Service Retirement Workbook, can provide a highly effective structure.
- Incorporate key visualisations:
| Visualisation Type | Purpose | Best Practice |
|---|---|---|
| Stat Tiles | Quick metrics overview | Highlight compliance percentages |
| Charts | Trend analysis | Display tag usage patterns over time |
| Grid Views | Detailed resource listings | Enable interactive filtering |
| Maps | Geographic distribution | Show regional tag compliance visually |
Once your layout is in place, you can enhance it with interactive and dynamic features to make the data even more engaging.
Creating Interactive Elements
Interactive elements make your dashboards more user-friendly and insightful. For instance, you can create a dynamic pie chart to visualise tag distribution across virtual machines using the following KQL query:
resources
| where type =~ 'Microsoft.Compute/virtualMachines'
| extend Environment = tostring(tags['Environment'])
| summarize Count = count() by Environment
| render piechart
This query breaks down the "Environment" tag and shows its distribution across virtual machines in a clear pie chart format.
Advanced Dashboard Features
To take your dashboard to the next level, include features such as:
- Dynamic filtering and conditional visibility: Adapt the dashboard to suit different user roles.
- Automated refresh intervals: Keep data up to date without manual intervention.
- Export options: Allow users to download and share insights easily.
For example, implementing a custom Azure Workbook significantly improved governance and reduced operational costs across multiple subscriptions.
Performance Optimisation Tips
To ensure your dashboard performs efficiently, consider these best practices:
- Use shorter time ranges to minimise data processing.
- Apply summary rules to simplify complex datasets.
- Cache frequently accessed data for quicker load times.
- Schedule data refreshes during off-peak hours to avoid performance lags.
You can also tailor dashboards to specific audiences by focusing on their key metrics and setting appropriate update frequencies:
| Audience | Key Metrics | Update Frequency |
|---|---|---|
| Executive | Cost allocation summaries | Weekly |
| Operations | Compliance tracking | Daily |
| Development | Resource utilisation | Real-time |
Tag Rules with Azure Policies
Azure Policy helps enforce tagging standards across Azure resources, ensuring compliance and consistency without manual intervention.
Required Tag Rules
With Azure Policy, you can set mandatory tagging requirements that block the deployment of resources missing essential tags. This ensures consistent data and simplifies resource tracking right from the start.
| Policy Effect | Purpose | Best Use Case |
|---|---|---|
| Audit | Monitor tag compliance | Testing policies during setup |
| Deny | Prevent non-compliant resources | Enforcing critical governance |
| Modify | Add missing tags automatically | Streamlining bulk tagging |
To establish effective tag rules:
- Create Policy Definitions: Define policies at the management group or subscription level to enforce your tagging framework. For example, you can mandate an "AppId" tag for all resource groups.
- Configure Tag Inheritance: Enable automatic tag propagation from resource groups to their resources, cutting down on manual tagging efforts.
-
Establish Tag Standards: For instance, a healthcare organisation adopted the following tag structure to ensure compliance:
This tagging approach helped them maintain strict security controls and meet regulatory requirements.{ "DataClassification": "PHI", "ComplianceStandard": "HIPAA", "AccessLevel": "Restricted" }
Once tag rules are in place, you can address any non-compliant tags through automated remediation.
Fix Non-Compliant Tags
Azure Policy simplifies the process of correcting resources that don't meet your tagging standards with automated remediation tools.
Steps to implement automated tag remediation:
-
Implement Remediation: Use the
deployIfNotExistsormodifypolicy effects to automatically fix tag violations on existing resources. - Set Up Managed Identities: Assign managed identities with the necessary RBAC roles to securely execute remediation tasks.
- Monitor Compliance: Use Azure Monitor to track tagging compliance and configure alerts for non-compliant resources.
| Resource Type | Common Tag Issues | Remediation Approach |
|---|---|---|
| Virtual Machines | Missing environment tags | Automatically applied via Modify effect |
| Storage Accounts | Incorrect cost centre format | Standardised through policy enforcement |
| Resource Groups | Inconsistent project codes | Fixed using inheritance-based correction |
These steps help ensure tagging consistency, making it easier to track costs and maintain governance. In the next section, we'll explore how these measures support broader resource management strategies.
Tag-Based Cost Management
When you pair strong tag monitoring with clear governance, you can turn tags into powerful tools for managing costs. Tag-based cost management helps track expenses across departments, projects, and environments, making it easier to understand and control cloud spending.
Cost Tracking by Tags
Azure Cost Management uses tag data to provide detailed insights into spending, helping you track costs with precision. By categorising resources with tags, you can break down expenses in a way that aligns with your organisational needs.
| Tag Category | Purpose | Example Value |
|---|---|---|
| Department | Track spending by department | Department: Finance |
| Cost Centre | Link costs to budget codes | CostCentre: CC-HR-001 |
| Environment | Monitor costs by environment | Environment: Production |
| Project | Allocate costs to projects | Project: EmployeePortal |
Here’s how to make cost tracking work effectively:
- Ensure tag consistency: Make sure billing tags flow from resource groups to child resources for accurate cost allocation.
- Customise cost views: Use Azure Cost Management to create tailored views filtered by specific tags.
- Analyse spending patterns: Group and filter expenses in Azure Cost Analysis to uncover trends and find areas for potential savings.
Once you’ve gained insights into your spending, the next priority is avoiding budget overruns by setting up tag-based budget alerts.
Tag-Based Budget Alerts
Budget alerts are a practical way to keep spending in check. They notify relevant teams when expenses approach or exceed predefined limits, giving you time to act.
| Alert Threshold | Recommended Action | Notification Target |
|---|---|---|
| 80% of budget | Review spending trends | Engineering team |
| 100% of budget | Explore cost-cutting options | Department heads |
| 110% of budget | Enforce immediate controls | Senior management |
Here’s how to set up effective budget alerts:
-
Define Tag-Based Budgets
For example, you might set a monthly budget of £5,000 for production resources and trigger alerts at 80% (£4,000). -
Configure Alert Actions
Use Action Groups to send notifications via multiple channels:- Email: Notify stakeholders directly.
- SMS: Send urgent updates.
- Integrated tools: Use platforms like Teams or Slack for real-time communication.
- Webhooks: Automate responses through custom workflows.
-
Monitor and Adjust
Regularly review how your budget performs against tagged resources. Adjust thresholds as needed to reflect actual spending trends.
For more tips on managing cloud costs, check out Azure Optimization Tips, Costs & Best Practices.
Common Tag Monitoring Issues
When monitoring Azure resource tags, several challenges can arise that may affect the accuracy of your monitoring efforts. Knowing these issues and their solutions is key to ensuring reliable tag monitoring.
Fix Data Update Delays
Azure Monitor can sometimes experience delays in updating tags, which can disrupt real-time reporting. These delays generally occur during the data ingestion process, which typically takes between 20 seconds and 3 minutes but can stretch to as long as 24 hours in high-throughput situations.
Here’s a breakdown of common delay types and their causes:
| Delay Type | Typical Duration | Key Causes |
|---|---|---|
| Agent Time | 20–60 seconds | Agent performance, network conditions |
| Pipeline Time | 1–3 minutes | Processing backlogs, high data volume |
| Indexing Time | 2–5 minutes | Storage optimisation, data complexity |
To handle these delays effectively:
- Optimise Agent Performance: Check the health and configuration of your agents. For example, with Azure Monitor Agent (AMA), use separate Data Collection Rules (DCRs) for VM insights and performance counters to prevent conflicts.
- Adjust Alert Configurations: Modify alert rules to consider ingestion delays. For instance, set the alert frequency to 15 minutes and use a 30-minute data window for better accuracy.
- Update Module Versions: Older module versions can cause delays. For example, the Az.Resources module increased tag update delays from 1 second to 30 seconds. Upgrading to version 7.1.0 resolved this issue.
Fix Tag Name Conflicts
Another common hurdle in tag monitoring is ensuring consistent tag naming. Conflicts often arise due to inconsistent naming conventions or the use of special characters, which can lead to reporting errors.
| Common Conflict | Impact | Resolution |
|---|---|---|
| Special Characters | Failed tag creation | Remove characters like <, >, %, &, ?, / from tag names |
| Numeric Prefixes | DNS zone conflicts | Avoid starting tag names with numbers |
| Unicode Characters | DNS compatibility issues | Use standard ASCII characters |
To maintain consistency and avoid these issues:
- Enforce Naming Conventions: Create and implement clear naming standards across your organisation. For example, use "CostCentre" consistently instead of variations like "Cost_Centre" or "cost-center".
- Use Azure Policy: Set up Azure Policy to enforce tag standards, ensuring that resources with non-compliant tags cannot be deployed. This helps maintain uniformity across your Azure environment.
"Log data ingestion into Azure Monitor usually takes between 20 seconds to 3 minutes, but this can change depending on factors like agent performance, network conditions, and the ingestion method used." – Pranay Reddy Madireddy, Microsoft External Staff
Regular audits and the application of updated policies can further enhance the reliability of your tag monitoring process.
Conclusion
Effective tag monitoring in Azure Monitor plays a crucial role in maintaining strong cloud governance. By applying the strategies discussed - like data collection, KQL analysis, and policy enforcement - organisations can improve cloud management while keeping costs under control.
Here’s a quick look at the key benefits of tag monitoring:
| Benefit Area | Impact | Key Outcomes |
|---|---|---|
| Cost Management | Immediate visibility | Potential savings of up to 72% with RVMIs and 90% with Spot VMs |
| Operational Efficiency | Automated tracking | Less manual effort and instant alerts for quick action |
| Governance | Policy compliance | Automated enforcement and detailed, audit-ready reports |
Additionally, Azure's Commitment Tiers offer up to a 15% discount on workspace ingestion costs for users ingesting 100 GB or more per day. This makes it a scalable and cost-effective option, especially for small and medium-sized businesses (SMBs) looking to grow.
Here are some practical steps to make the most of Azure Monitor:
- Use the Azure Monitor agent to set up precise data filtering.
- Establish daily collection limits to avoid overspending.
- Take advantage of Azure Advisor's recommendations to optimise Log Analytics workspace costs.
- Conduct regular audits of tag compliance through Azure Policy.
By combining these practices with Azure Monitor’s robust tag tracking features, organisations can create a scalable and cost-conscious framework that supports both growth and governance.
For more detailed advice on optimising Azure costs and boosting cloud performance, check out Azure Optimization Tips, Costs & Best Practices.
FAQs
How can I use Azure Monitor to maintain consistent and compliant tagging across my Azure resources?
To keep your Azure resources consistently and correctly tagged, the first step is to establish a clear tagging strategy. This involves creating standard naming conventions - like sticking to lowercase letters and hyphens - and making sure all tags comply with your organisation's governance policies.
You can simplify and enforce this process by using Azure Policy. This tool helps ensure compliance by automatically applying tags to new resources and checking existing ones for alignment with your rules. Pair this with Azure Monitor, which allows you to track and analyse tags, making it easier to spot inconsistencies and confirm your tagging approach meets governance and reporting requirements.
By using both Azure Policy and Azure Monitor, you can create a strong system for managing tags, keeping your resources consistent and aligned with organisational standards across your Azure environment.
How can I use Azure Monitor to effectively track and analyse resource tags?
To efficiently track and analyse resource tags using Azure Monitor, start by establishing a clear and consistent tagging strategy. Choose straightforward tag names and values, apply them to all resources as they are created, and, where possible, automate the tagging process. This approach saves time and minimises the risk of errors.
Leverage Azure Policy to enforce tagging rules across your environment, ensuring all resources remain compliant. Regularly review and update tags to ensure they stay relevant for governance, reporting, and cost management purposes. This practice not only enhances visibility into resource usage but also contributes to smoother operations.
For users in the UK, make sure that any cost-related data is shown in GBP (£) and use the DD/MM/YYYY format for dates. This ensures reports are accurate and aligned with local standards.
How does Azure Monitor help manage costs using resource tags?
Azure Monitor provides a handy way to manage costs effectively through resource tags. These tags let you categorise resources, making it easier to track expenses, analyse spending patterns, and assign costs to particular teams or projects. They also help pinpoint areas where you could cut down on costs.
Using tags not only enhances oversight but also ensures resources are used more efficiently. This enables businesses to budget smarter and scale operations with confidence. With clearer insights into spending, organisations can minimise waste and fine-tune their cloud expenses for sustained savings.
